
Before you start
- An Apple Silicon Mac on macOS 12 or later, with the Simplify Edits preview build.
- Claude Code (the
claudecommand) or Codex (thecodexcommand), installed and signed in. Check in Terminal withclaude --versionorcodex --version.
The app looks in the usual install places, including /opt/homebrew/bin, ~/.npm-global/bin, ~/.local/bin and the Codex app’s bundled tool, so a normal install is found without extra setup.
Choose the provider
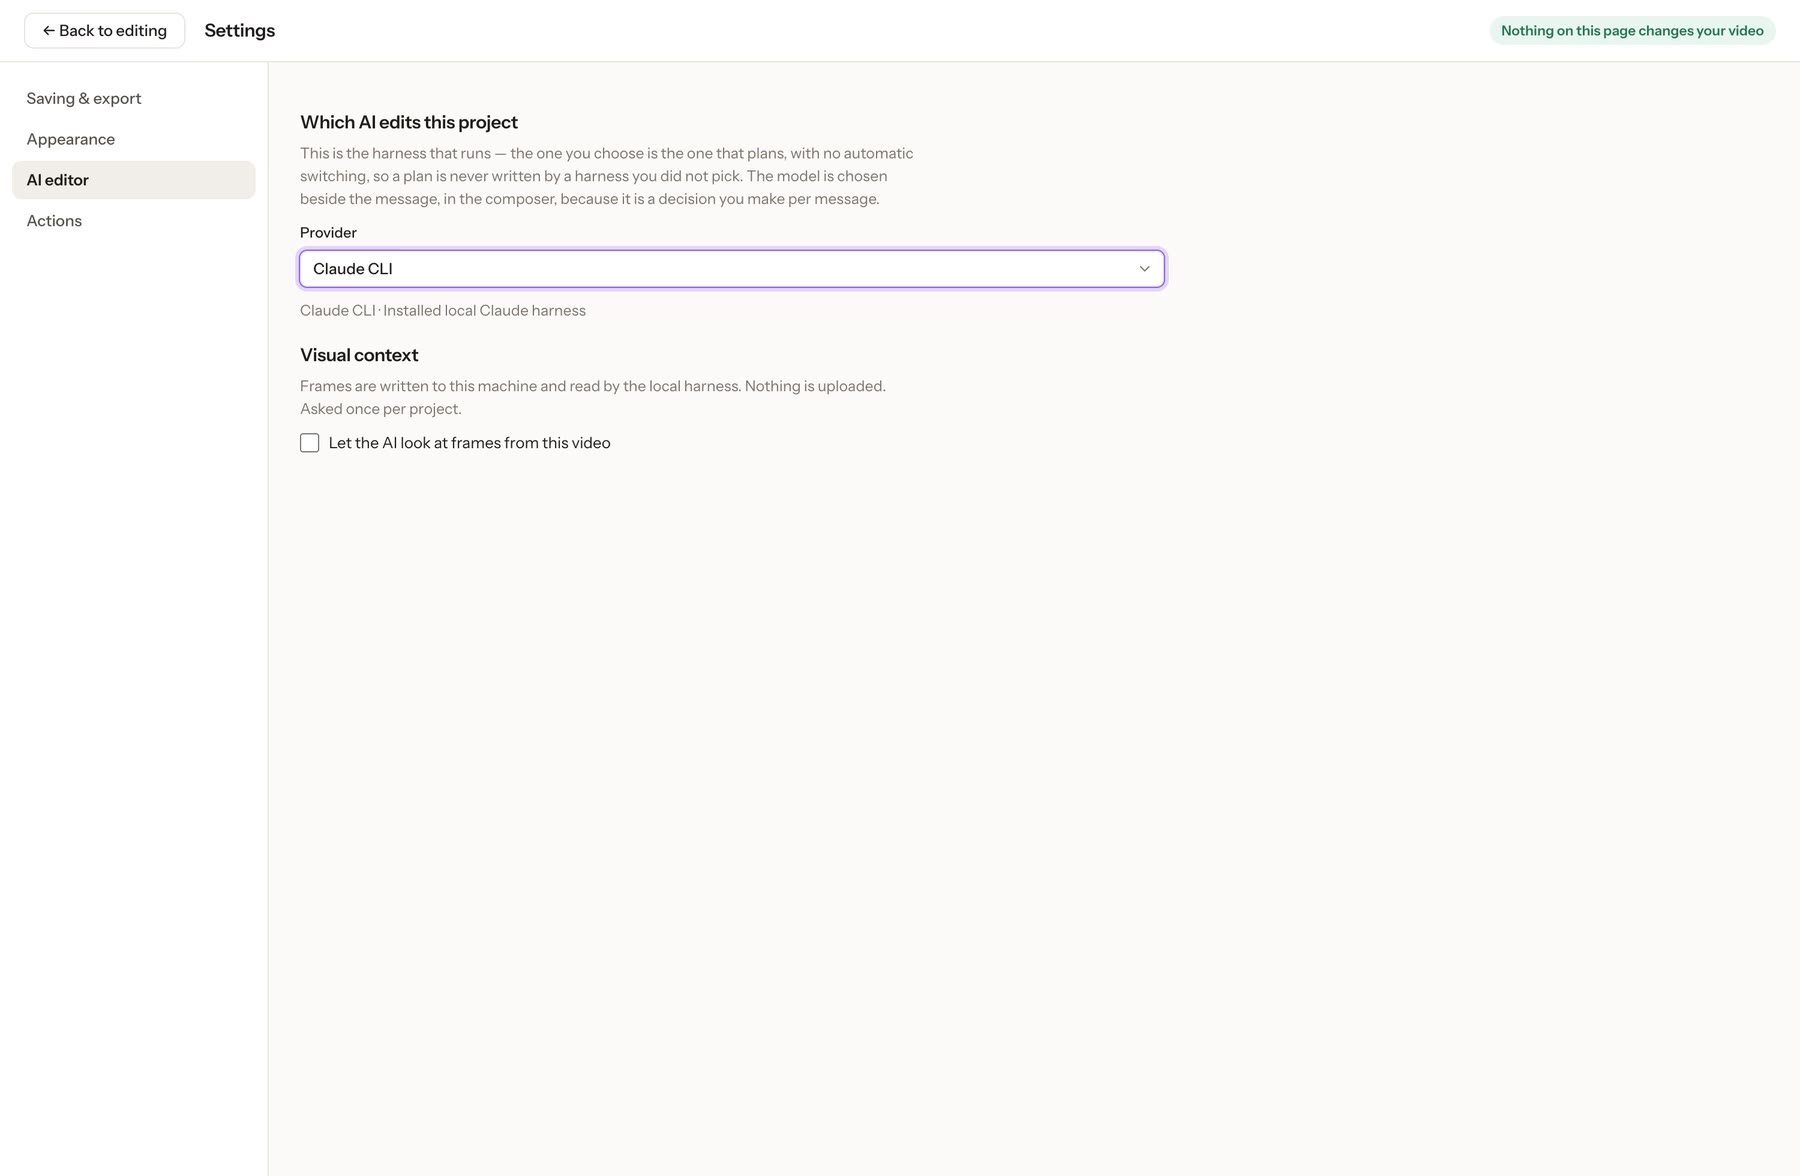
- Open Settings → AI editor (or Change harness from the model picker in the Assistant panel).
- Under Provider, choose Claude CLI or Codex app-server. The app never switches to a provider you didn’t pick.
Choose the model, per message
The model sits beside the message box. With Claude Code you can pick Sonnet, Opus or Haiku. With Codex the list comes from your installed Codex.
Decide about video frames
Let the AI look at frames from this video is off unless you turn it on, and it’s asked once per project. When on, the app saves one small still (640 px wide) per clip on your Mac and lets the agent read it. The agent may then send that still to its model provider as part of the request.
Before starting, check that your chosen agent is installed and signed in on this Mac. Use your own provider account.